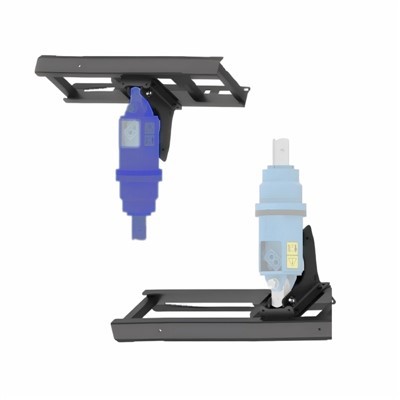
Installing an auger tooth pocket is a crucial process that can significantly impact the performance and longevity of your auger equipment. As a trusted supplier of high-quality Auger Tooth Pocket, I understand the importance of a proper installation. In this blog post, I will guide you through the step-by-step process of installing an auger tooth pocket, ensuring that you get the most out of your equipment.
Understanding the Importance of a Proper Auger Tooth Pocket Installation
Before we dive into the installation process, let's take a moment to understand why a proper installation is so important. An auger tooth pocket serves as the connection point between the auger tooth and the auger bit. A well-installed tooth pocket ensures a secure fit, which in turn maximizes the efficiency of your drilling operations. It also helps to prevent premature wear and tear on both the tooth and the pocket, reducing the need for frequent replacements and saving you time and money in the long run.
Tools and Materials You Will Need
To install an auger tooth pocket, you will need the following tools and materials:
- Welding equipment: A reliable welding machine is essential for attaching the tooth pocket to the auger bit. Make sure you have the appropriate welding rods for the type of metal used in your auger bit and tooth pocket.
- Measuring tools: A tape measure or caliper will help you ensure that the tooth pocket is installed in the correct position and at the right angle.
- Grinding tools: A grinder or file can be used to clean and prepare the surface of the auger bit before welding.
- Safety equipment: Welding can be dangerous, so it's important to wear appropriate safety gear, including welding gloves, a welding helmet, and protective clothing.
- Auger Tooth Pocket: Of course, you will need the actual tooth pocket. Make sure you choose a high-quality pocket that is compatible with your auger bit and the type of drilling you will be doing.
- Auger Teeth: Once the tooth pocket is installed, you will need to insert the appropriate auger teeth.
- Auger Pin Clip: This is used to secure the auger tooth in the pocket.
Step-by-Step Installation Process
Step 1: Prepare the Auger Bit
The first step in installing an auger tooth pocket is to prepare the surface of the auger bit. Use a grinder or file to clean and smooth the area where the tooth pocket will be installed. Remove any rust, paint, or debris to ensure a good weld. Measure the position where the tooth pocket will be placed, making sure it is centered and at the correct angle. Mark the position with a marker or scribe.
Step 2: Position the Tooth Pocket
Once the auger bit is prepared, carefully position the tooth pocket on the marked area. Use clamps or magnets to hold the pocket in place while you check its alignment. Make sure the pocket is level and straight, and that it is positioned at the correct angle for optimal drilling performance. Double-check your measurements to ensure accuracy.
Step 3: Weld the Tooth Pocket
With the tooth pocket in position, it's time to start welding. If you are not experienced in welding, it's a good idea to have a professional do this step for you. However, if you are confident in your welding skills, follow these guidelines:


- Set your welding machine to the appropriate settings for the type of metal and thickness of the auger bit and tooth pocket.
- Start by tack welding the pocket in place at several points around the perimeter. This will hold the pocket in position while you complete the full weld.
- Once the tack welds are in place, proceed to weld the pocket along the entire perimeter. Use a continuous, smooth welding technique to ensure a strong and durable bond.
- After welding, allow the area to cool completely before proceeding.
Step 4: Clean and Inspect the Weld
Once the weld has cooled, use a grinder or wire brush to clean the area around the weld. Remove any slag or spatter to ensure a smooth finish. Inspect the weld for any cracks, porosity, or other defects. If you find any issues, you may need to re-weld the area or seek professional assistance.
Step 5: Install the Auger Tooth
With the tooth pocket securely welded to the auger bit, it's time to install the auger tooth. Insert the tooth into the pocket, making sure it fits snugly. Then, insert the Auger Pin Clip to secure the tooth in place. Check that the tooth is properly aligned and that it can move freely within the pocket.
Step 6: Test the Installation
Before using your auger equipment, it's important to test the installation. Spin the auger bit by hand to make sure the tooth rotates smoothly and that there are no signs of binding or misalignment. If everything looks good, you're ready to start drilling.
Tips for a Successful Installation
- Choose the right tooth pocket: Make sure you select a tooth pocket that is compatible with your auger bit and the type of drilling you will be doing. Consider factors such as the size, shape, and material of the pocket.
- Follow the manufacturer's instructions: Different tooth pockets may have specific installation instructions, so be sure to read and follow them carefully.
- Take your time: Installing an auger tooth pocket is a precise process that requires attention to detail. Don't rush through the steps, and take the time to ensure everything is done correctly.
- Maintain your equipment: Regular maintenance of your auger equipment, including inspecting and replacing worn parts, will help ensure optimal performance and longevity.
Conclusion
Installing an auger tooth pocket is a critical step in maintaining the performance and efficiency of your auger equipment. By following the steps outlined in this blog post and using high-quality Auger Tooth Pocket, Auger Teeth, and Auger Pin Clip, you can ensure a secure and reliable installation.
If you have any questions about installing an auger tooth pocket or are interested in purchasing our high-quality auger wear parts, please don't hesitate to contact us. We are here to help you get the most out of your equipment and ensure the success of your drilling operations.
References
- Industry standards and best practices for auger equipment installation and maintenance.
- Manufacturer's instructions for specific auger tooth pocket models.