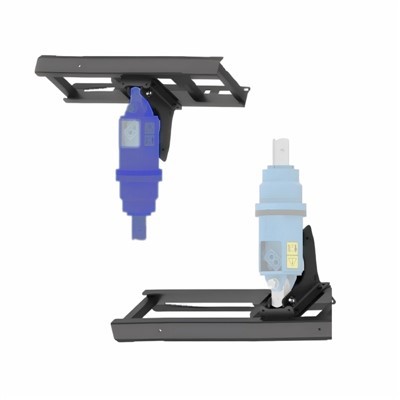
Hey there! As a supplier of auger wear parts, I often get asked about the installation process for these components. In this blog post, I'll walk you through the steps involved in installing auger wear parts, from start to finish. Whether you're a seasoned pro or a newbie in the industry, this guide will help you ensure a smooth and successful installation.
Understanding Auger Wear Parts
Before we dive into the installation process, let's quickly go over what auger wear parts are and why they're important. Auger wear parts are the components of an auger drill that come into contact with the ground during drilling operations. These parts include Auger Drill Pilot, Auger Teeth, and Auger Pin Clip, among others.
Over time, these parts can wear down due to the constant friction and impact with the ground. When this happens, it's important to replace them to maintain the efficiency and performance of your auger drill. Installing new wear parts can also help prevent damage to other components of the drill and extend its lifespan.
Pre-Installation Preparation
Before you start installing the auger wear parts, it's important to take a few precautions to ensure your safety and the success of the installation. Here are some steps you should take:
- Gather the necessary tools: You'll need a variety of tools to install the wear parts, including a wrench, socket set, hammer, and pliers. Make sure you have all the tools you need before you start.
- Inspect the parts: Before installing the new wear parts, inspect them carefully to make sure they're in good condition and free from damage. Check for any cracks, chips, or other defects that could affect their performance.
- Clean the drill: Use a wire brush or compressed air to clean the drill and remove any dirt, debris, or old lubricant. This will help ensure a good fit between the wear parts and the drill.
- Read the manufacturer's instructions: Every auger wear part is different, so it's important to read the manufacturer's instructions carefully before installing them. This will help you understand the specific installation requirements and ensure that you install the parts correctly.
Installation Process
Now that you've completed the pre-installation preparation, it's time to start installing the auger wear parts. Here's a step-by-step guide to help you through the process:
Step 1: Remove the Old Wear Parts
The first step in installing new auger wear parts is to remove the old ones. This may involve removing bolts, pins, or other fasteners that hold the parts in place. Use the appropriate tools to remove the fasteners and carefully remove the old wear parts from the drill.
Step 2: Install the Auger Drill Pilot
The auger drill pilot is the part of the auger that helps guide the drill into the ground. To install the drill pilot, align it with the center of the auger and insert it into the drill bit. Use a hammer to tap the pilot into place until it's securely seated.
Step 3: Install the Auger Teeth
The auger teeth are the cutting edges of the auger that break up the ground. To install the teeth, align them with the slots on the auger and insert them into place. Use a pin or clip to secure the teeth to the auger. Make sure the teeth are installed in the correct orientation and that they're evenly spaced around the auger.


Step 4: Install the Auger Pin Clip
The auger pin clip is a small part that helps hold the teeth in place. To install the pin clip, insert it into the hole in the tooth and the auger. Use a pair of pliers to bend the clip into place and secure it.
Step 5: Check the Installation
Once you've installed all the wear parts, it's important to check the installation to make sure everything is secure and properly aligned. Use a wrench to tighten any bolts or fasteners that may have loosened during the installation process. Check the alignment of the teeth and the drill pilot to make sure they're straight and centered.
Step 6: Lubricate the Parts
After you've checked the installation, it's a good idea to lubricate the wear parts to help reduce friction and wear. Use a high-quality lubricant that's designed for use with auger wear parts. Apply the lubricant to the teeth, the drill pilot, and any other moving parts of the auger.
Post-Installation Testing
Once you've installed the new auger wear parts and lubricated them, it's time to test the drill to make sure it's working properly. Here are some steps you should take:
- Start the drill: Turn on the drill and let it run for a few minutes to warm up. Listen for any unusual noises or vibrations that could indicate a problem with the installation.
- Test the drilling performance: Use the drill to make a few test holes in the ground. Pay attention to the drilling performance and make sure the drill is cutting through the ground smoothly and efficiently.
- Check the wear parts: After you've completed the test drilling, stop the drill and inspect the wear parts. Check for any signs of wear or damage, such as chips, cracks, or excessive wear. If you notice any problems, stop using the drill immediately and contact a professional for assistance.
Conclusion
Installing auger wear parts is an important part of maintaining the efficiency and performance of your auger drill. By following the steps outlined in this guide, you can ensure a smooth and successful installation. Remember to always take the necessary safety precautions and to read the manufacturer's instructions carefully before installing any wear parts.
If you have any questions or need further assistance with the installation process, don't hesitate to contact us. We're a leading supplier of auger wear parts, and we're here to help you find the right parts for your needs. Whether you're looking for Auger Drill Pilot, Auger Teeth, or Auger Pin Clip, we've got you covered.
So, what are you waiting for? Contact us today to learn more about our products and services and to start the procurement negotiation process. We look forward to hearing from you!
References
- Manufacturer's instructions for auger wear parts
- Industry best practices for auger drill maintenance and repair