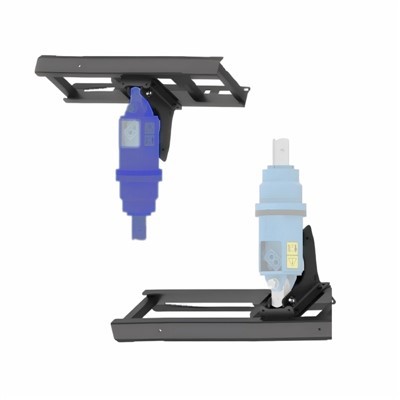
Installing a side shift cradle frame can significantly enhance the functionality and versatility of your equipment, especially in the context of earth drills and related machinery. As a trusted Side Shift Cradle Frame supplier, I understand the importance of a proper installation process. In this blog post, I will guide you through the step - by - step process of installing a side shift cradle frame, ensuring that you can achieve optimal performance and safety.
Pre - installation Preparations
Before you begin the installation, it is crucial to gather all the necessary tools and materials. You will need a set of wrenches, sockets, a torque wrench, a level, and safety equipment such as gloves and safety glasses. Additionally, carefully review the installation manual provided with your side shift cradle frame. This manual contains detailed instructions specific to your model and is an invaluable resource throughout the installation process.
Inspect the side shift cradle frame for any damage that may have occurred during shipping. Check for cracks, bent components, or missing parts. If you notice any issues, contact our customer support team immediately. We are committed to providing high - quality products, and we will work with you to resolve any problems.
Step 1: Mounting Surface Preparation
The first step in the installation process is to prepare the mounting surface on your equipment. This surface should be clean, flat, and free of any debris or rust. Use a wire brush or sandpaper to remove any rust or paint that may interfere with the proper installation of the cradle frame.


Measure the mounting surface to ensure that it is the correct size for the side shift cradle frame. The frame should fit snugly on the surface without any gaps or misalignments. If necessary, make any adjustments to the mounting surface to achieve the proper fit.
Step 2: Positioning the Side Shift Cradle Frame
Once the mounting surface is prepared, carefully position the side shift cradle frame on the surface. Use a level to ensure that the frame is perfectly horizontal and vertical. This is important for the proper operation of the side shift mechanism and the overall stability of the equipment.
Align the mounting holes on the side shift cradle frame with the holes on the mounting surface. You may need to use a drift pin or a similar tool to help align the holes. Make sure that the alignment is precise before proceeding to the next step.
Step 3: Securing the Side Shift Cradle Frame
After the frame is properly positioned and aligned, it's time to secure it to the mounting surface. Insert the bolts through the mounting holes in the frame and the mounting surface. Use a wrench or socket to tighten the bolts, but do not fully tighten them at this stage.
Tighten the bolts in a criss - cross pattern to ensure even pressure distribution. This will help prevent the frame from warping or becoming misaligned during the tightening process. Once all the bolts are hand - tightened, use a torque wrench to tighten them to the specifications provided in the installation manual. Over - tightening or under - tightening the bolts can lead to premature wear or failure of the frame.
Step 4: Connecting the Hydraulic Lines (if applicable)
Many side shift cradle frames are equipped with hydraulic systems to facilitate the side shift function. If your frame has hydraulic lines, carefully connect them according to the instructions in the manual. Make sure that the connections are tight and free of any leaks.
Before operating the hydraulic system, check the fluid level in the hydraulic reservoir. Add fluid if necessary, using the recommended type of hydraulic fluid for your equipment. Bleed the hydraulic system to remove any air bubbles that may be present. This will ensure smooth and efficient operation of the side shift mechanism.
Step 5: Testing the Side Shift Cradle Frame
Once the installation is complete, it's time to test the side shift cradle frame. Start the equipment and engage the side shift mechanism. Observe the movement of the frame to ensure that it operates smoothly and without any binding or unusual noises.
Check the range of motion of the side shift mechanism to make sure that it meets the specifications provided in the manual. If you notice any issues, such as limited movement or excessive play, stop the equipment immediately and re - check the installation. It may be necessary to make some adjustments to the frame or the hydraulic system.
Step 6: Final Checks and Maintenance
After testing the side shift cradle frame, perform a final visual inspection. Check all the bolts and connections to make sure that they are still tight. Look for any signs of leaks, damage, or wear on the frame and the hydraulic components.
Establish a regular maintenance schedule for the side shift cradle frame. This should include checking the hydraulic fluid level, inspecting the bolts for tightness, and lubricating any moving parts as recommended in the manual. Regular maintenance will help extend the lifespan of the frame and ensure its continued reliable operation.
Advantages of Using a Side Shift Cradle Frame
A side shift cradle frame offers several advantages over a Fixed Centre Cradle Frame. The ability to shift the position of the drill or other equipment laterally provides greater flexibility in drilling operations. This is particularly useful in situations where the drilling location needs to be adjusted slightly without moving the entire machine.
The side shift function allows for more precise drilling, especially in areas with limited access or where multiple holes need to be drilled in close proximity. It also reduces the need for re - positioning the equipment, which can save time and increase productivity on the job site.
Contact Us for Your Side Shift Cradle Frame Needs
If you are in the market for a high - quality Side Shift Cradle Frame, look no further. As a leading supplier, we offer a wide range of side shift cradle frames to suit various applications and equipment types. Our products are designed and manufactured to the highest standards of quality and durability.
Whether you are a contractor, a rental company, or an equipment owner, we can provide you with the right side shift cradle frame for your needs. Our team of experts is available to answer any questions you may have about the installation, operation, or maintenance of our products.
If you are interested in purchasing a side shift cradle frame or would like to learn more about our product range, please contact us. We look forward to working with you and helping you enhance the performance of your equipment.
References
- Manufacturer's installation manual for Side Shift Cradle Frame
- Industry standards and best practices for equipment installation and maintenance